Controlling Perspective
The image we typically have of buildings, and things that are above us, usually gives more weight to the lower part of the object. By tilting our head upward, the lowest part of the object appears larger and the upper part of the object appears smaller. In the scene below, the edges of the building are parallel and perfectly vertical. But in the image, the lines that correspond to these edges are not parallel. These lines converge toward a point above the top of the image. This phenomenon is due to perspective projection. The lens in our eye, and our cameras, projects an image onto a sensor. In our eye, the retina is the sensor that reacts to light projected from the lens at the front of the eye. In our camera, we project an image onto a CMOS sensor using a lens. How does projection work and why does it change the size of parts of our image?

Image of the 9/11 Memorial at Exchange Place, Jersey City. Camera tilted up so that parallel edges of the building converge toward the top of the frame. The “natural” view.
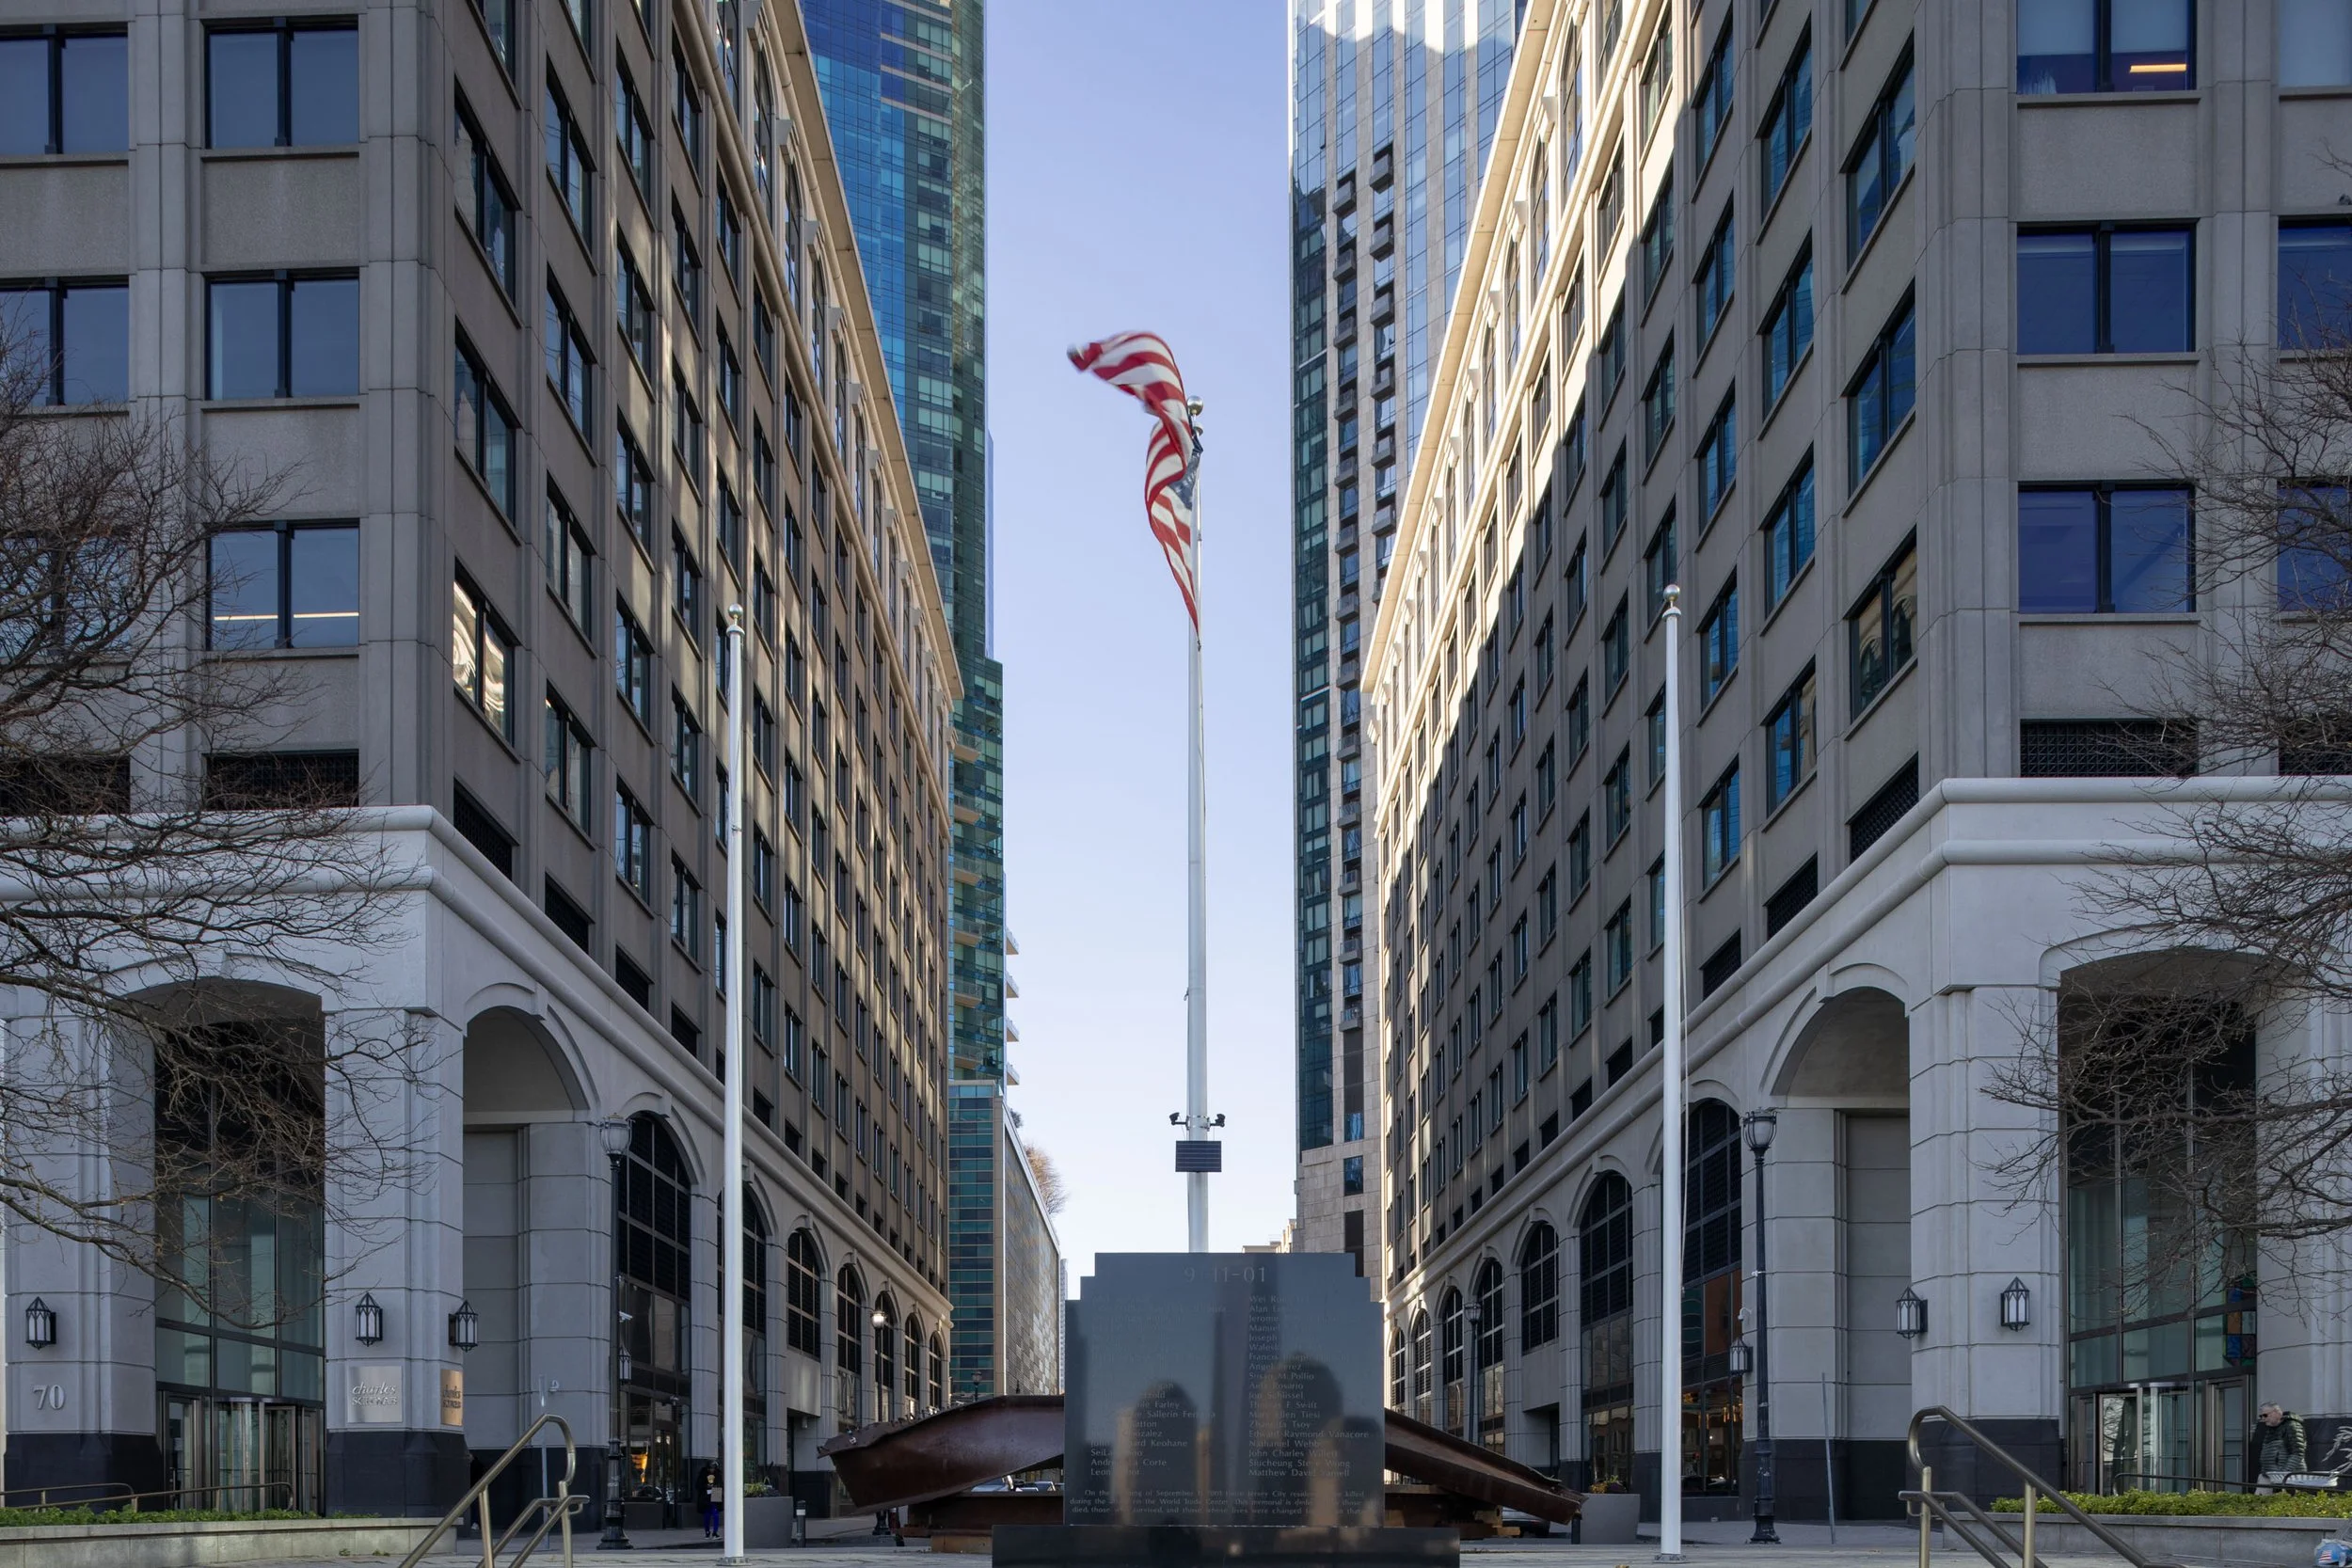
The 9/11 memorial at Exchange Place in Jersey City. Perspective corrected by leveling the camera and adjusting composition using lens shift movement. Lens: Canon TS-E 24mm F/3.5L
To obtain the perspective corrected image of the memorial, I leveled the camera in two planes, so that the camera was free to rotate about a perfectly vertical axis. I then rotated the camera about this axis until the optic axis of the lens perpendicular to the plane of the building. These steps of camera setup ensure that the sensing plane of the camera is parallel with the building facade. The consequence of perfectly leveling the camera the flag is cut off in the image. To correct this, I used upward lens shift. Lens shift can be obtained on tilt shift lenses.
Why does this happen?
A perspective projection is a map from a set of 3 dimensional points (points in the world) to a set of 2 dimensional points (in the image) that satisfy a condition. In the case of the pin hole model of the camera, the condition is that points in the 2D image correspond to points in the 3D space through straight line segments passing through the pin hole. So images are formed by a bundle of rays, passing through a single point, connecting objects in the 3D world to points in our 2D image. This is the pin hole model of the camera. Below is a diagram of points in an object projected into an image.
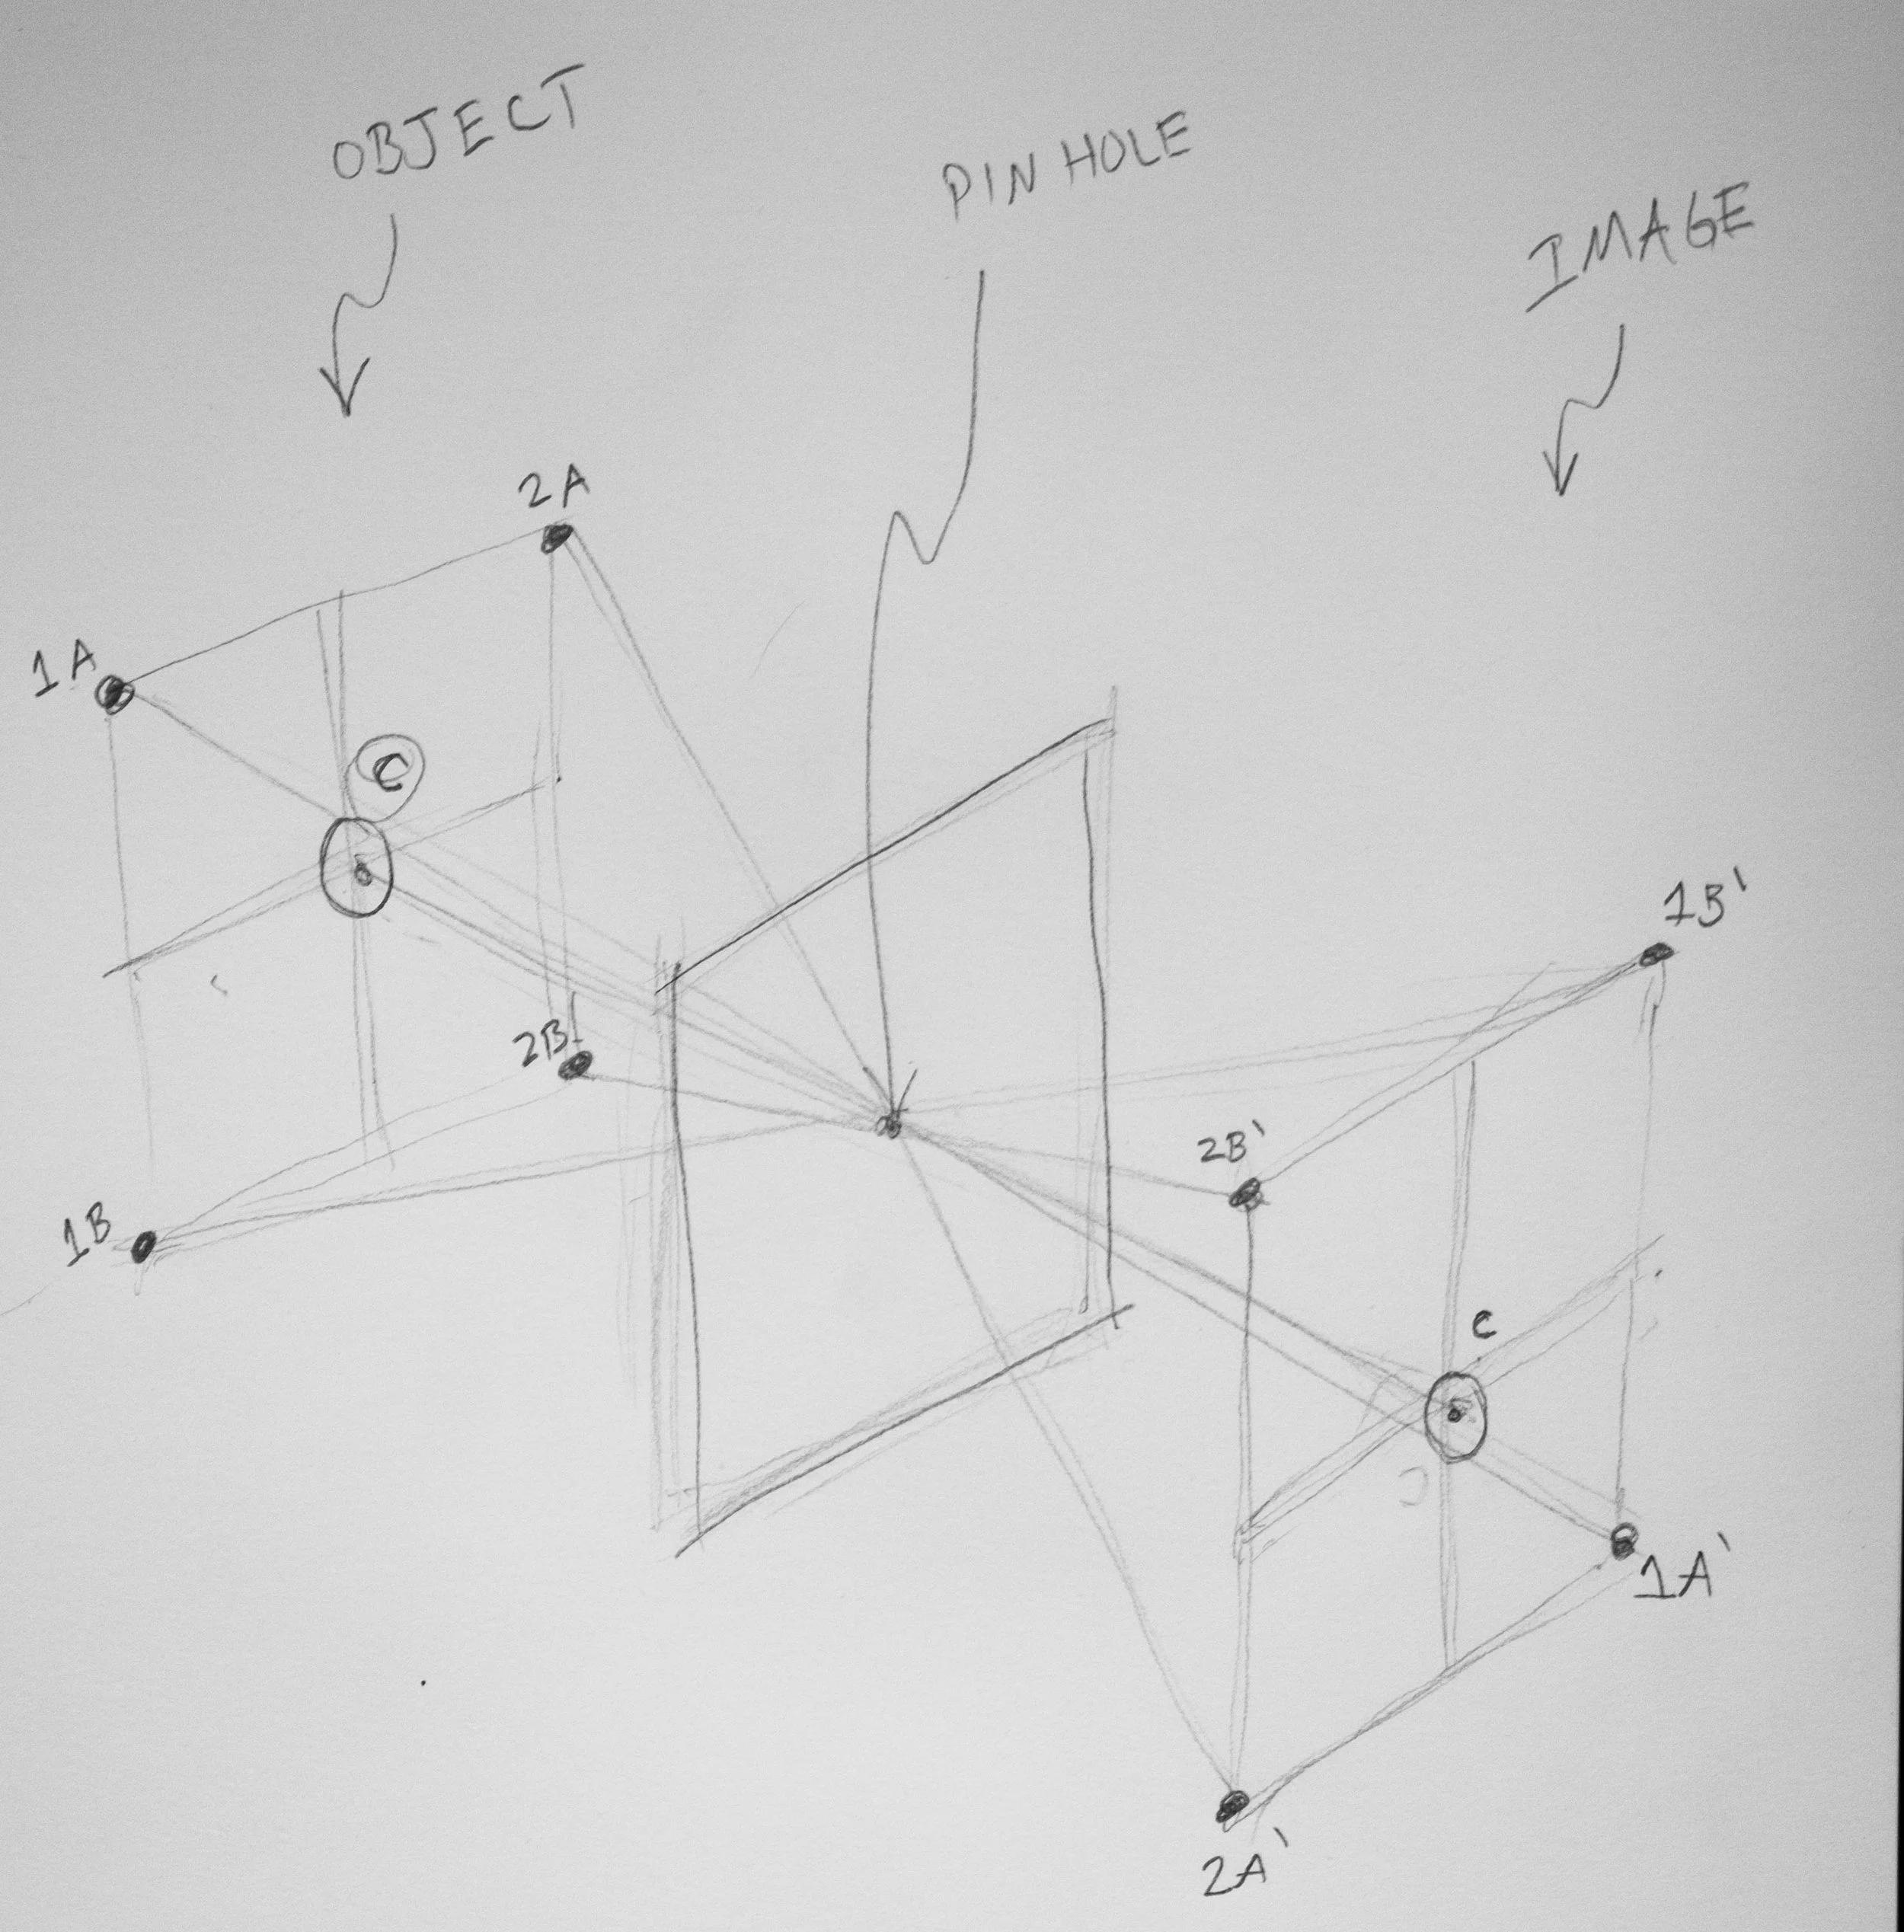
Diagram of points C, 1A, 1B, 2A, 2B projected through a pin hole to form their images C’, 1A’, 1B’, 2A’, 2B’
The perspective is controlled by the location and direction of the lens and its relation to the sensing plane (film or sensor). So, the most important perspective correction tool is not a perspective control lens. The most important tool is a tripod, preferably with a geared head and a bubble level. Most cameras today come with electronic levels that can display the angle in both pitch and roll directions. In the following video I visited New York City’s lower east side where I’m using a tripod with a geared head to demonstrate how to level the camera in two planes.
Perspective can drastically shape the way objects are perceived in an image. So if I learn to control it, I can control the relative size of objects in the scene. And I can control the perspective by changing the position and direction of the camera. By tilting the camera upward, what was a rectangle becomes a trapezoid. Leveling the camera keeps vertical lines vertical.

Paulus Hook Ferry Stop, Camera is tilted up slightly. vertical edges are converging lines in the image
Paulus Hook Ferry Stop, Camera is Level. Vertical edges are vertical in the image
Colgate Clock
In this scene, the viewer tilts their head up significantly to see the whole clock. This causes significant convergence of the vertical lines toward the top of the image. When the camera is leveled, the vertical lines stay parallel. But in order to contain the whole clock, the lens needed to be shifted upward. One way to think of this is the image circle goes with the lens, so shifting the lens up projects a different area of the lens’s image circle onto the sensor. Without shift, a level camera only picks up half the clock at this range. With shift, we see the entire clock and can keep the camera perfectly level to ensure the vertical towers stay parallel. This is a very unnatural looking image because it occurs very far off to the edge of the lens’s field of view. Our eyes have sharpest vision at the center, in the macula. So when we need to see things that are tall, we look up at them. But with a tilt shift lens, we can create unnatural looking images by selecting on the very edge of the image to project onto our sensor.

Colgate clock, Jersey City. Natural View.

Colgate Clock, Jersey City. Camera leveled, Lens shift used.
So next time you need to ensure the relative sizes of objects in your image is the same, align your camera so that the sensing plane is parallel with the plane of that object. Do this with a geared tripod head and a level. A shifting lens is a good option if you are interested in maximizing the resolution of your perspective controlled shots. But a wide angle lens pointed perfectly level will achieve the same correction. Those images can be cropped to the region of interest. The cropping process is analogous to the shifting the sensor relative to the lens on a shifting lens setup.